VIDEO – HOW TO USE SUMMARY
STEPS TO DOWNLOAD
-
Step 1: Download Roadbook for Discovery from the App Store (iPhone) or Google Play (Android)

-
Step 2: Login with the username and password provided to you via email and accept the terms and conditions
This will be your lead bookers email address and your booking order number. You will receive this via email 100 days before your trip takes place.

-
Step 3: Select and validate your trip. You will need to download it.

-
Step 4: Please wait while it downloads, depending on data quality, this may take a few minutes.

-
Step 5: Accept the Route Data

-
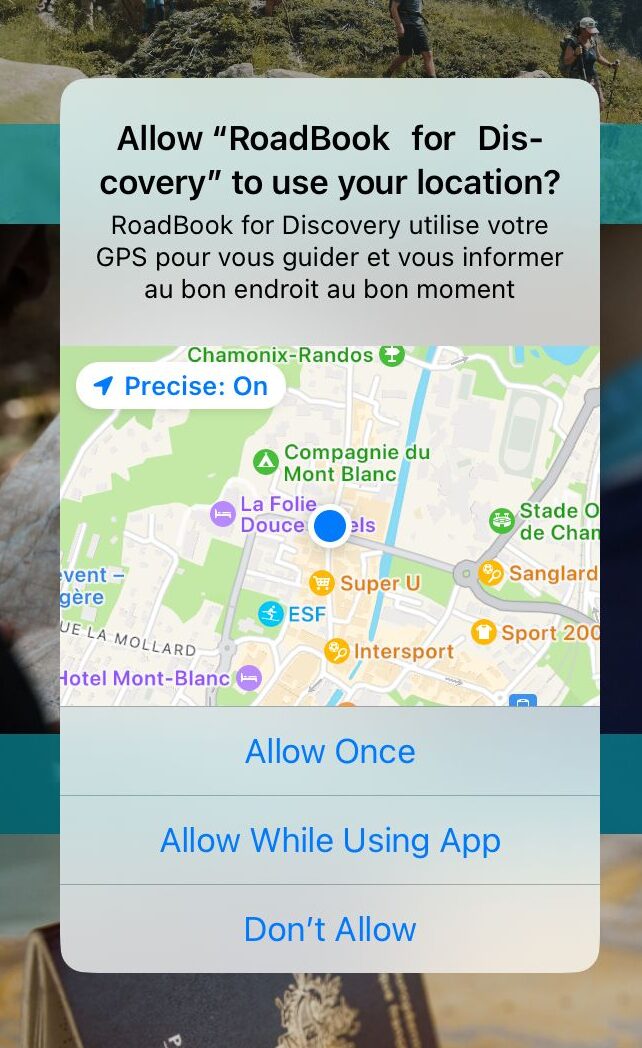
Step 6: It is essential to accept the location request
-
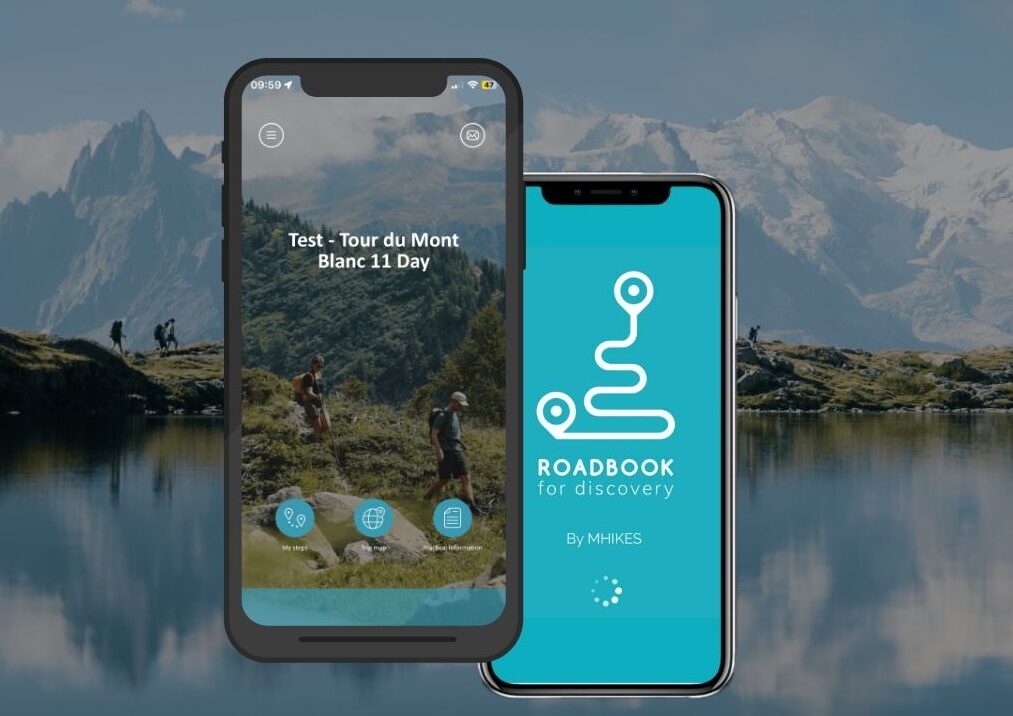
Step 7: Once the trip is downloaded you will see your home screen
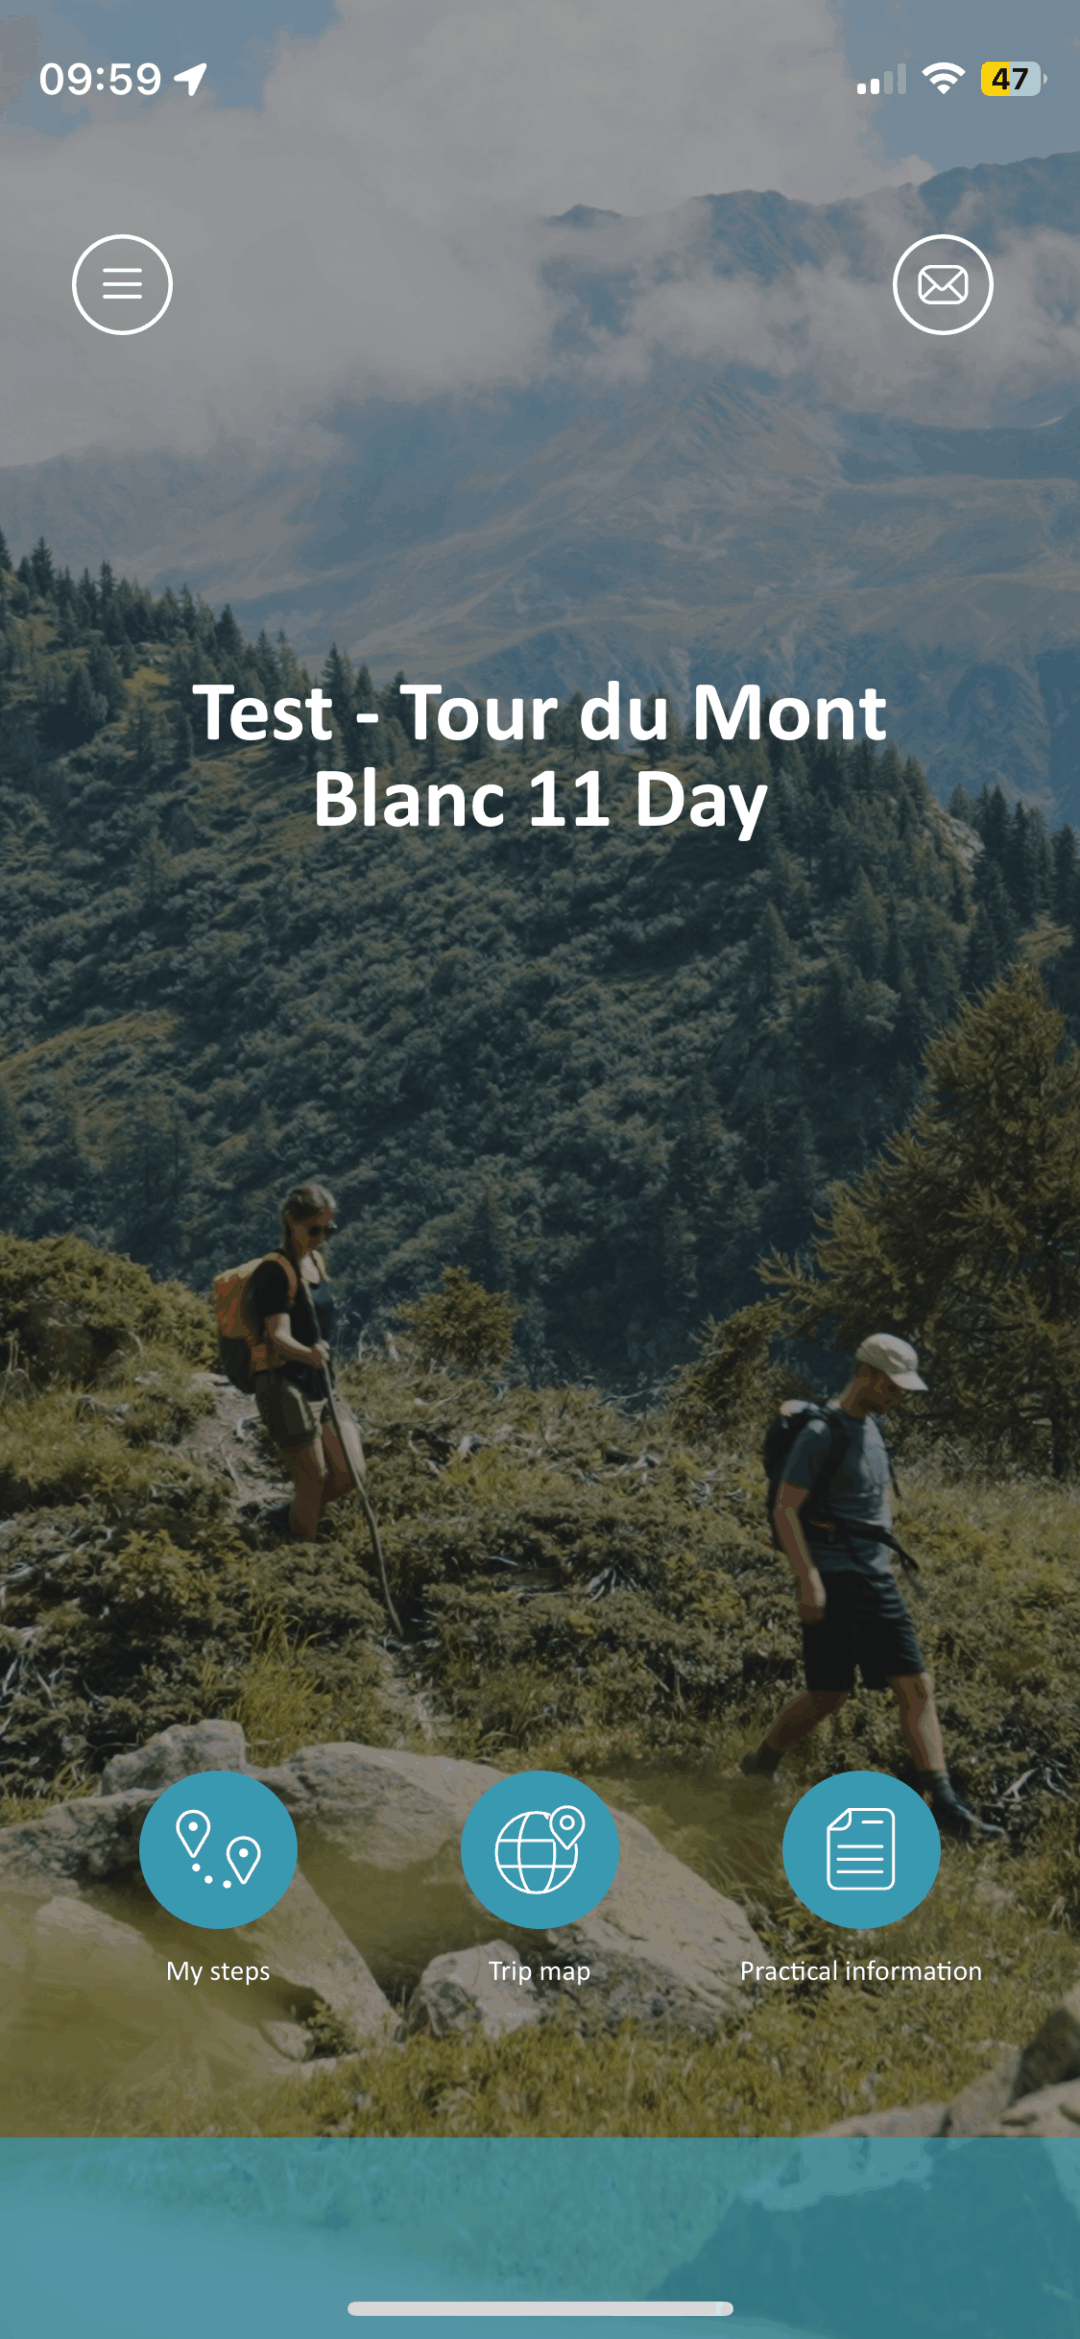
HOME SCREEN:
You will see three categories displayed on your home screen
- 1: My steps
- 2: The trip map
- 3: Practical information
- My steps: By clicking here, you’ll find the stages of your trip, presented day by day. Click on a stage to consult its general description and the day’s hiking routes (on which you will be guided). Each stage you will have a hiking track for the day and a ‘partner’ which is your accommodation for the evening.

- Trip Map: This is the trip general map, showing the route of all the stages along the way. By clicking on the numbered markers, the corresponding stage appears at the screen’s bottom. Clicking on them takes you back to the stage details.

- Practical Information: Here you will find your daily itinerary, rooming layouts, catering options etc. Along with documents containing information for your trip and security information.

THE SIDE MENU:
Here you will find another way to access your trip, the map, practical information. You will also find your application settings and the log out button. Please note if you log out you will loose your eRoadbook and have to redownload from the beginning. There is a certain amount of downloads allocated per itinerary so please make sure to stay logged in.
Note: The messaging function will not be used.

MY DOCUMENTS:
Here you will find many helpful resources for your trek such as the kit list, pre trip information, insurance recommendations, how to choose the right backpack and much more!
Note: All the documents are in the ‘past’ section


Note: Our shortcuts and logistics page is not available in the documents section, as timetables are typically released in June and require updates. This means it cannot be accessed without data or WiFi. Please open the page a few days before your trip to download any timetables you may need, or check the information using mobile data along the route or WiFi the night before for the following day.

EMERGENCY INFORMATION:
In the security information section, you’ll find the best ways to contact Adventure Base during your trek, along with the mountain rescue number in case of an emergency.

YOUR TRIP:
Learn how to navigate, look ahead, see variant routes, plan shortcuts and see the details for each day.
- Open the stage you’d like to look at, here you will find the description of the day, the route and the accommodation for the evening.

- By clicking on the accommodation you will be able to see a description of the refuge/auberge/hotel with any relevant information you may need to know for your stay. Along with the contact details, if you are running late and expect to arrive at the refuge later than 18:00pm please call them to let them know. You can also pin point them on the map and have a direct link to their website.

- By clicking on the track you will be able to see all of the information for your days hike. Along the top underneath you can see the statistics such as the ascent, descent and daily trekking times. You can see the timetables for these shortcuts via the shortcuts and logistics page mentioned above. All of the ‘Points of Interests’ are listed below with the refuges you will pass, water points, toilet stops, restaurants, towns and bus stops/gondola stations.
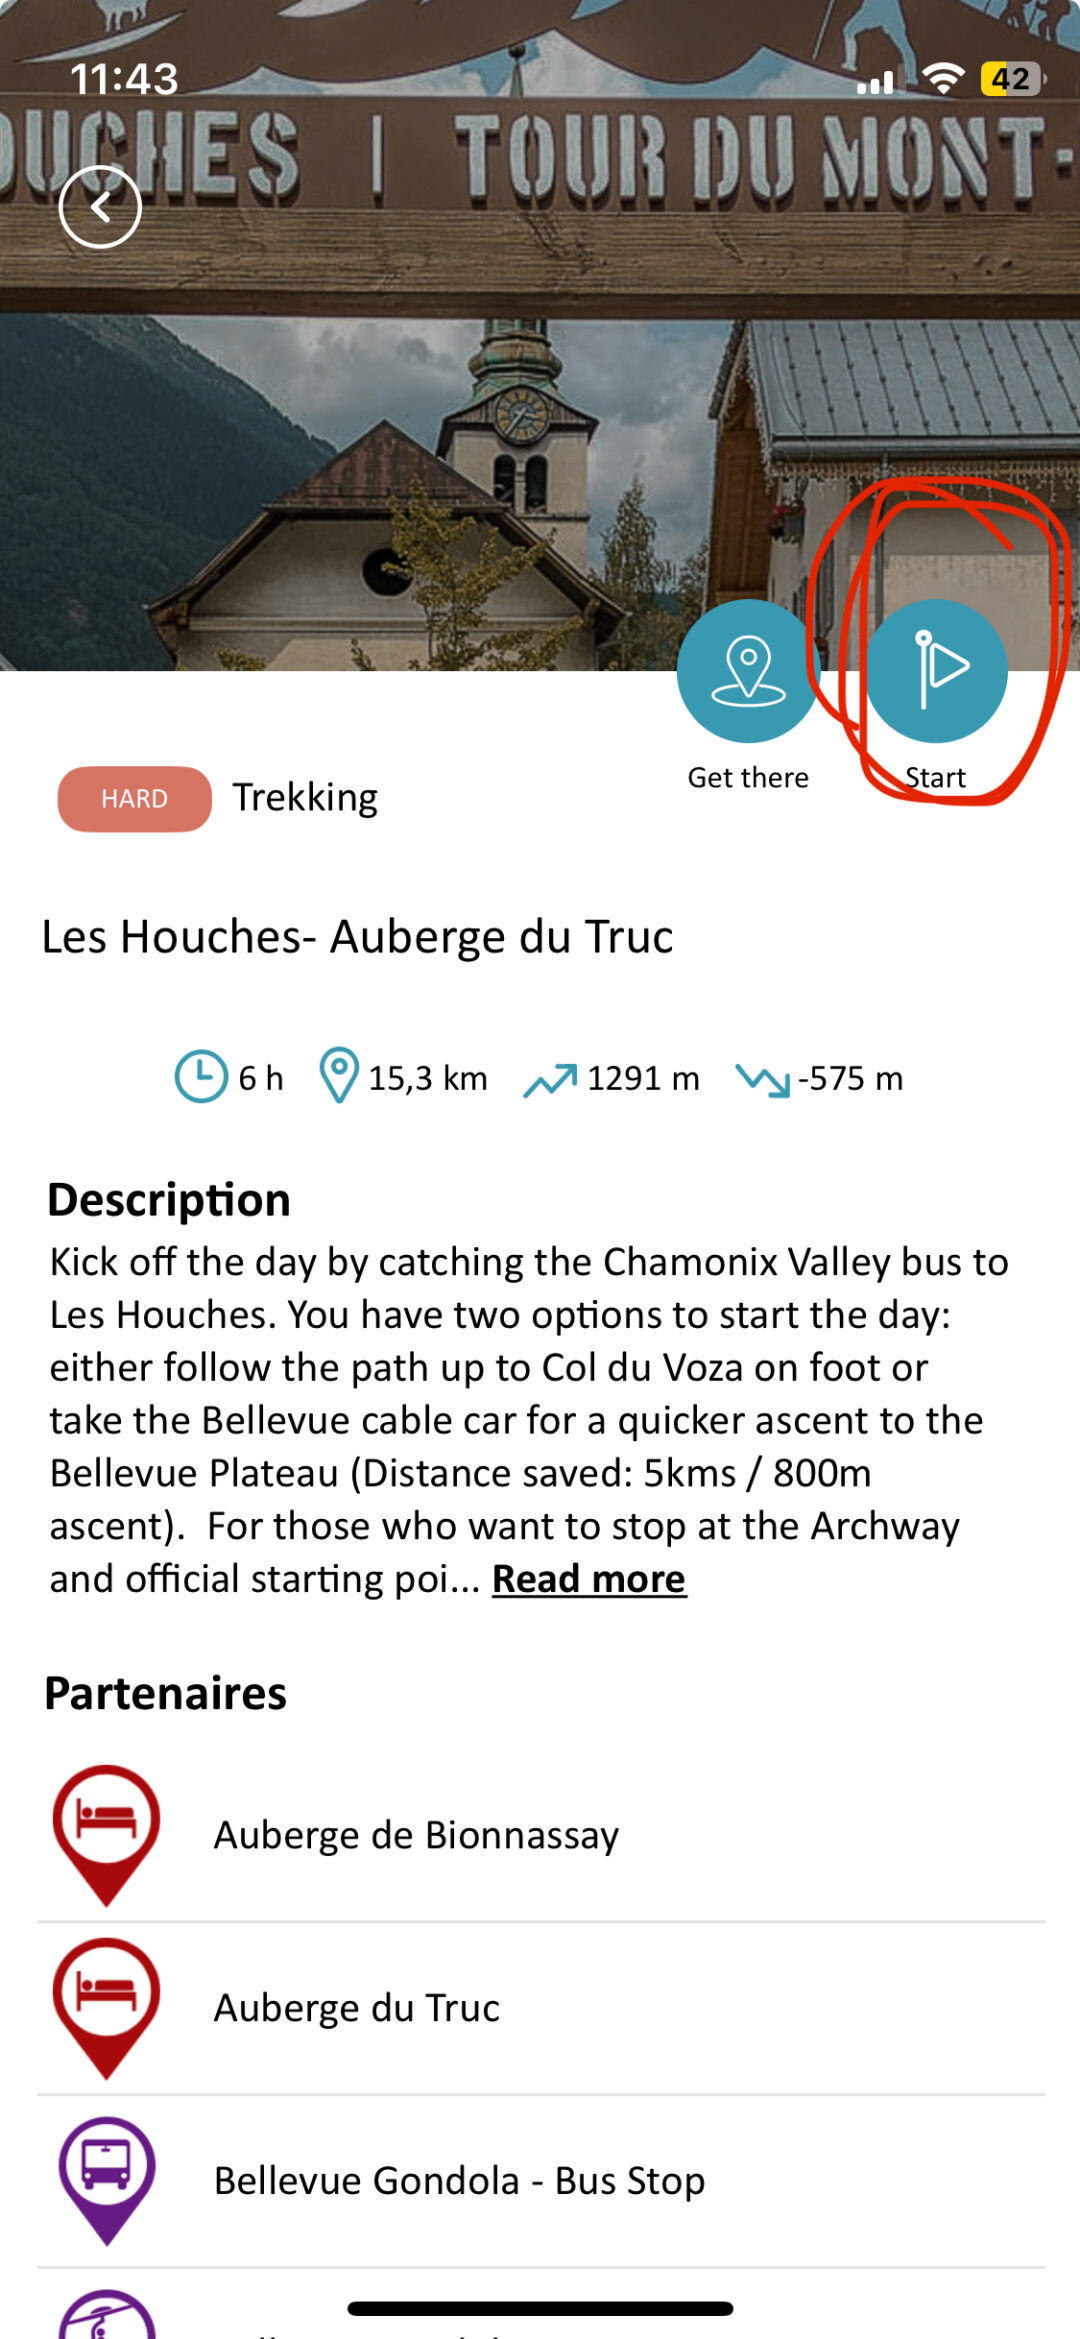
- By clicking the flag icon you can see your track. The lighter blue line is the variant that is available, you will have the choice to take it or not at the intersection. This one below for example is the Col du Tricot. The Icons represent the ‘Points of Interest’ which you can click on to see more information. The green flag is your starting point and the red flag is your end point for the day.

- SOS will allow you to send your exact location via SMS. Or if you need to call the emergency services you can tell them your exact location.

- By clicking the circle with three dots at the top of the screen you can access your application settings too. Check the settings for sound, sleep, guidance and connection mode (online / offline). You can also set the distance at which directional POIs (points of interest) and track exit alerts are triggered.

- Finally to exit the route you click the cross button inside the blue circle with three dots to return to the stage.

D DAY – OFF YOU GO!
In the main menu, select the first stage and then the first route.
- To be guided to the starting point of the hike, click on the ‘pin location’ icon .
- If you’re at the start of the hike, press the ‘flag icon’, walk a few meters and the GPS will locate you and magnetise you to the track. An audible alert tells you that guidance is starting: let yourself be guided!
Tips and Tricks:
- Being magnetised to the track: Once you’re on the track, voice guidance shows you the directions to take: you’re magnetised to the track. If you leave the track, an audible and visual alert tells you that you’ve left the trail, and takes you back to it.
- POI’s: directional points of interest to guide you along the trail by voice, e.g. “turn right”. – Points of interest to discover the destination. They are triggered when you pass near them.
- Partners: Routes can include partners. By clicking on them, you can consult their description (address, telephone number,etc.). You can also be guided to them.
- Use an external battery for long trips.
- A sturdy case for your mobile is recommended.
- When your trip is downloaded, you can switch to airplane mode to save battery power.
- During the trip, you can put your phone in a pocket of your backpack or clothing to be guided by voice instructions only.
- In standby mode, the visuals of the direction and discovery POIs will only be displayed if you unlock your phone. On Android, to take full advantage of the application’s features, remember to turn off the power- saving mode.
You can find answers to login and access questions in our Travel App FAQ journal. If you still need help, feel free to email us at hello@adventurebase.com.
Happy trekking.
